Beginner’s Guide: How to Start Freezer Cooking Without Wasting Food
This post may contain affiliate links. If you buy through them, I may earn a small commission at no extra cost to you.
You do not need a huge chest freezer, a whole weekend, or a color-coded spreadsheet to start freezer cooking. You need a few meals your family already likes, some bags or containers, a marker, and a simple system you will actually keep using on a tired Tuesday.
Most beginners waste food for the same few reasons: they freeze things that do not freeze well, they forget what is in the freezer, they thaw food unsafely and have to throw it out, or they make ten portions of a brand-new recipe no one ends up liking. Every one of those problems is fixable — and this guide shows you how, step by step.
By the end, you will know the basic method from planning to cooking, what containers are worth buying, how long foods keep their best quality, and exactly what to make on your first weekend: just three easy meals, no marathon. Start small, learn what your family loves, and your freezer will save you money instead of becoming a place good intentions go to be forgotten.
When you are ready for a full session, try The 2-Hour Freezer Prep Session: 10 Dinners, One Shopping List — it uses this exact system, start to finish.

What You’ll Need
- Gallon freezer bags — the workhorse of freezer cooking
- FoodSaver vacuum sealer — prevents freezer burn, keeps food fresh 5x longer
What Freezer Cooking Is — and Why It Saves Money and Time
Freezer cooking simply means preparing meals, or parts of meals, ahead of time and freezing them for later. That can look a few different ways:
- Full meals ready to cook, like a bag of soup ingredients that goes into a slow cooker
- Cooked meals ready to reheat, like chili or a casserole
- Components, like cooked shredded chicken, browned ground beef, or a batch of meatballs that become several different dinners
It saves money in practical, unglamorous ways. You buy ingredients once, on purpose, instead of making three small trips and impulse-buying each time. You can buy family packs of meat on sale and use all of it before it spoils. You cook at home on nights when you would otherwise order takeout because nothing is ready. And you waste less, because food that would have sat too long in the fridge gets frozen while it is still good.
It saves time the same way. Chopping onions for five meals takes barely longer than chopping for one. Cooking once and cleaning once for several dinners beats starting from zero every night. And on your busiest days, “cooking” becomes thaw, heat, and add a simple side.
What freezer cooking is not: cooking for an entire month in one exhausting day, eating the same food for weeks, or serving mushy, freezer-burned meals. Done well, no one at the table should be able to tell dinner started in the freezer.
The Basic Method, Step by Step
Step 1: Plan
Start with meals your family already eats and likes. Look at your calendar for the next two weeks and pick realistic nights — soups and slow cooker meals for your busiest days, bakes for weekends. For your first try, choose 3 to 5 meals, not 15. Write down what each meal needs and what you will serve with it fresh.
Step 2: Shop
Make one list from your plan, organized by store area if that helps: produce, meat, dairy, pantry, frozen. Check your pantry, fridge, and freezer first so you do not buy a fourth jar of something you already own. Buy freezer bags and labels on this same trip if you need them.
Step 3: Prep
Wash produce, chop vegetables, and mix sauces. Decide per recipe what gets cooked before freezing and what goes in raw. As a simple rule: ground meat for chili and soup is often better browned first, meatballs hold together better shaped raw and frozen firm, and chicken for slow cooker bags usually goes in raw. Follow the recipe you are using for that meal, and keep raw meat separate from vegetables and cooked foods while you work.
Step 4: Package
Cool cooked food completely before packaging — this matters for both safety and texture. Portion into family-size or single servings, whichever matches how you will actually eat it. Press as much air as you reasonably can from bags, or wrap pans tightly. Air is the enemy that causes freezer burn.
Step 5: Label
Label every single package, no exceptions. Details are in the labeling section below, but the short version is: name, date, and cook instructions, written before or right as you fill the package.
Step 6: Freeze
Freeze bags flat on a sheet pan until solid, then stack them. Place new packages in the coldest part of the freezer at first, in a single layer where possible, and keep the freezer at 0°F or below. Do not stack warm or soft packages tightly together — they will freeze into a solid block and cool slowly.
Step 7: Thaw
Thaw safely using one of the methods in the thawing section below — fridge, cold water, or microwave — and plan ahead. Most family-size meals need overnight in the fridge.
Step 8: Cook
Cook to the right internal temperature with a food thermometer, add fresh toppings and sides, and enjoy a dinner that took you 15 minutes instead of an hour. Refrigerate leftovers within 2 hours.
Best Containers and Bags
You do not need to buy everything. Start with good gallon freezer bags and one foil pan size, then add what your cooking style calls for.
Gallon freezer bags, frozen flat
- Pros: Cheap, take up very little space when frozen flat, thaw fast, perfect for soups, marinades, and slow cooker bags. Easy to label with a marker.
- Cons: Single-use unless you wash and reuse bags that held vegetables only (do not reuse bags that held raw meat), can puncture on sharp bone edges, not ideal for casseroles you want to bake in shape.
Foil pans with lids or foil covers
- Pros: Go from freezer to oven without dirtying another dish, great for pasta bakes, enchiladas, and casseroles, easy to give away to a neighbor or new parent.
- Cons: Take more space, can bend, need a tight cover or food dries out. Place pans on a sheet pan for support when moving them.
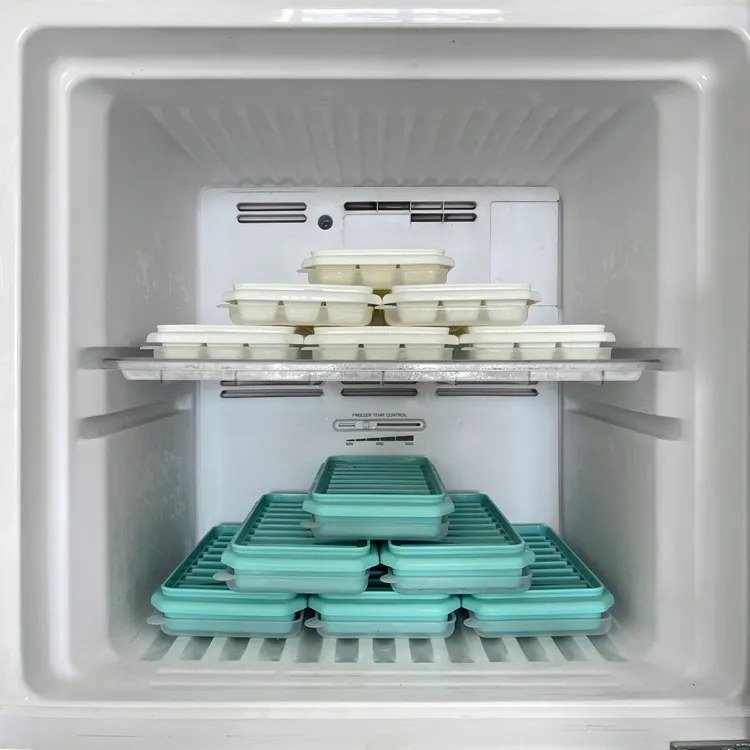
Silicone trays and muffin-style molds
- Pros: Perfect for portioning soup, sauces, meatloaf minis, and breakfast items. Food pops out easily, trays are reusable, and frozen portions can move to a bag for long storage.
- Cons: Cost more up front, portions need a second container for long-term freezing, lids are not always airtight.
Rigid plastic or glass containers
- Pros: Reusable, stack well, good for soups and leftovers. Glass goes to the oven or microwave (check the manufacturer’s directions for freezer-to-oven use, as not all glass can handle that temperature change).
- Cons: Take the most freezer space, round shapes waste room, and lids crack if dropped when frozen.
The beginner kit that covers 90% of meals: one box of gallon freezer bags, one box of quart bags for components, a stack of 8×8 or 9×13 foil pans, a permanent marker, and masking tape or labels. That is enough to start.

Safe Thawing Rules
Thawing is where beginners most often create waste — food thawed unsafely has to be thrown away. Use one of these three methods, per USDA guidance:
1. In the refrigerator — safest and easiest
Move the meal from freezer to fridge the night before, in a container or on a plate to catch drips. Small items may thaw in a few hours; a full gallon bag or casserole usually needs overnight, sometimes a full 24 hours for a thick pan. Cook raw meat within 1 to 2 days after thawing.
2. In cold water — faster, needs attention
Keep food in a leak-proof bag, submerge in cold tap water, and change the water every 30 minutes so it stays cold. Small packages may thaw in about an hour; larger bags take 2 to 3 hours. Cook immediately after thawing this way.
3. In the microwave — for cooking right away
Use the defrost setting and check often, separating pieces as they soften. Cook immediately after microwave thawing, because some areas begin to cook while others are still cold.
Never thaw on the counter. A room-temperature counter lets the outside of food sit for hours in the range where bacteria grow quickly, while the center is still frozen. It is not worth the risk, and it is the most common reason beginners end up throwing food away.
Cooking from frozen is fine for some foods — soups and casseroles often go straight to a pot or oven with extra time — but follow the specific recipe directions and always verify the center reaches a safe temperature.
What Freezes Well — and What Does Not
Freezes Well
- Soups, stews, chilis, and curries (without dairy added — stir cream or cheese in at serving)
- Cooked and raw meatballs, meatloaf, and burger patties
- Shredded cooked chicken, browned ground beef or turkey
- Casseroles and pasta bakes with sauce
- Beans, lentils, and cooked grains in small portions (rice can dry out — add a splash of water when reheating)
- Chopped onions, peppers, corn, peas, broccoli, and most sturdy vegetables
- Marinara and tomato-based sauces
- Cookie dough, bread dough, muffins, and pancakes
- Shredded cheese, butter, and milk for cooking (texture changes, fine for recipes)
Does NOT Freeze Well
- Lettuce and salad greens: go limp and watery. Freeze meals without them and add fresh at serving.
- Cucumber and raw celery for eating raw: lose their crunch and turn soft. They are fine cooked in a soup.
- Raw potatoes: turn grainy and sometimes dark in the freezer. The exception: potatoes that are cooked — especially blanched, roasted, or mashed — freeze much better. For freezer soups and bakes, either cook potatoes first, use frozen store-bought potatoes (already blanched by the manufacturer), or add fresh potatoes at cooking time.
- Fried foods: coatings go soggy and lose their crispness. Recrisping in an oven or air fryer helps, but they are never quite the same.
- Cream sauces and dairy-heavy soups: can split and look curdled after thawing. The fix: freeze the base without cream, milk, sour cream, or soft cheese, and stir dairy in during the last few minutes of reheating, off a hard boil.
- Hard-boiled eggs and egg-based sauces like mayonnaise: whites turn rubbery and sauces separate.
- Soft fresh herbs for garnish: basil and cilantro darken. They are fine blended into a sauce or soup, but use fresh for topping.
Knowing this one list saves more food than any gadget. If an ingredient is on the second list, leave it out of the freezer package and add it fresh when you cook.
How Long Foods Keep: Storage Times for Best Quality
Frozen food kept continuously at 0°F stays safe, but quality — flavor, texture, color — fades over time. These USDA-consistent ranges are for best quality, not hard safety deadlines:
| Food | Best quality in freezer |
|---|---|
| Soups and stews | 2 to 3 months |
| Cooked meat and poultry, in sauce or gravy | 2 to 3 months |
| Casseroles and pasta bakes | 2 to 3 months |
| Cooked ground meat (browned beef or turkey) | 3 to 4 months |
| Meatballs and meatloaf, cooked | 2 to 3 months |
| Raw chicken pieces | Up to 9 months |
| Raw chicken, whole | Up to 12 months |
| Raw ground meat and ground turkey | 3 to 4 months |
| Raw beef roasts and steaks | 6 to 12 months |
| Cooked rice and grains | 1 to 2 months for best texture |
| Shredded cheese | Up to 6 months |
Practical takeaway for beginners: plan to eat most prepared freezer meals within 3 months. Write the date on every label, and rotate older meals to the front — which brings us to the system that makes that automatic.

Labeling, Inventory, and FIFO Rotation
Labeling feels fussy for exactly one minute, then saves you for three months. On every package, write:
- Name of the meal
- Date frozen — month and day are enough if you eat within the same season, but include the year if you are building a bigger stash
- Short cook instructions — “Slow cooker low 6 hrs, chicken to 165°F” or “Bake 375°F, 40 min”
Now add a simple inventory. A piece of paper or a small whiteboard on the freezer or fridge door is plenty. Two columns: meal name and date frozen. Cross a line off when you eat it. That list stops the two classic beginner problems: forgetting a meal until it is past its best quality, and buying ingredients for a meal you already have.
FIFO means “first in, first out.” When you add new bags, put them behind or under the older ones. When you plan dinners, pick from the front and from the top of your inventory list first. That tiny habit — oldest first — is the entire rotation system. Restaurant kitchens use it, and it works just as well in a home freezer.
Do a 5-minute freezer check once a month: move anything approaching 3 months to next week’s plan, toss anything with severe freezer burn or an unknown label and date (when in doubt about how long it has been there or how it was stored, throw it out), and update the list.
The 5 Most Common Beginner Mistakes That Waste Food
1. Starting too big.
Making 20 meals of food your family has never tried is the fastest path to a freezer full of food no one wants. Start with 3 meals you already know they like, in normal portions. Success first, scale later.
2. Freezing foods that do not freeze well.
A beautiful salad kit, a cream soup, and raw potato chunks in a stew will all disappoint, through no fault of your cooking. Use the list above and add fragile ingredients fresh.
3. Not labeling — or labeling vaguely.
“Soup” in marker, with no date, helps no one in February. Every unlabeled package eventually becomes a mystery package, and mystery packages get thrown away. Name, date, instructions, every time.
4. Packaging warm food or trapping air.
Warm food raises the temperature around it, cools slowly, and forms large ice crystals that ruin texture. Cool completely first, chill in the fridge if needed, press air out of bags, and cover pans tightly.
5. Thawing on the counter and refreezing carelessly.
Counter thawing is unsafe, and refreezing raw thawed meat without cooking it first is also unsafe. Rule of thumb: thaw safely, cook, and only freeze again after cooking. Plan portions so you only thaw what you will eat.
Avoid those five, and you are already ahead of most first attempts.
Your First Weekend Starter Plan: 3 Easy Meals
Do not start with a huge session. Make these three forgiving, family-friendly meals — named here in general terms so you can use your own favorite versions or the recipes on this site:
- A tomato-based chili with ground beef or turkey and beans. Brown the meat, cool it, bag it with beans, tomatoes, onion, and spices. Chili is the most forgiving freezer meal there is and reheats beautifully.
- A chicken soup or chicken slow cooker bag with carrots, celery, onion, and broth. Bag it raw, freeze flat, and cook it in a slow cooker or pot. It teaches you the raw-bag method with almost no risk of overcooking.
- A pasta bake with marinara, mozzarella, and a vegetable your family likes. Cook pasta just shy of done, mix with sauce, freeze in a foil pan, and bake from thawed. It teaches you the casserole method and portioning.
Shop Saturday morning with one list, prep Saturday or Sunday afternoon in about an hour, and eat one meal that week and two the next. Notice what your family asks for again — those become your regular rotation. For ready-made versions to try next, see 10 Freezer Meals to Make in January When You’re Done With Takeout for lighter soups and skillets, and 12 Freezer Meals for Back-to-School Season when life gets busier.
Storage and Food Safety: The Short Version to Remember
- Keep the freezer at 0°F or below and use a freezer thermometer if you are not sure yours runs cold enough.
- Cool completely before freezing, freeze in shallow portions for faster, more even freezing, and label with name and date.
- Most prepared freezer meals are best within 3 months, even though they remain safe while frozen.
- Thaw in the fridge, in cold water changed every 30 minutes, or in the microwave — never on the counter.
- Cook poultry and ground meats to 165°F, other ground meats to at least 160°F, and reheat leftovers to 165°F. Use a food thermometer.
- When in doubt about a package’s age, storage, or safety, throw it out. One meal is not worth a foodborne illness.
FAQs
Do I need a deep freezer to start?
No. A regular fridge-top or side-by-side freezer holds 10 to 15 flat bags easily. Start with what you have, keep your freezer at 0°F or below, and consider a chest freezer only after you know you love the system and want to buy meat in bulk.
What foods freeze well for meal prep?
Soups, stews, chilis, curries, casseroles and pasta bakes, meatballs and meatloaf, shredded cooked chicken, and browned ground beef or turkey all freeze well. Beans, lentils, sturdy vegetables like peppers, corn, and broccoli, and tomato-based sauces are also reliable beginner choices.
Which foods should never be frozen?
Avoid freezing lettuce and salad greens, cucumber, raw potatoes, fried foods, cream sauces, mayonnaise, and hard-boiled eggs — they turn limp, grainy, soggy, separated, or rubbery. Freeze the base without those ingredients and add them fresh at serving instead.
How can I avoid freezer burn on my meals?
Press as much air as possible out of bags, wrap pans tightly, and use freezer-safe packaging. Cool food completely before freezing, keep the freezer at 0°F or below, label each package with name and date, and eat most prepared meals within about 3 months. Freezer burn is a quality problem, not a safety problem — trim small dry spots.
What containers are best for freezing?
Start with gallon freezer bags frozen flat — they save the most space, thaw fast, and work for soups and slow cooker bags. Add foil pans for pasta bakes and casseroles, and rigid plastic or glass containers for soups you will reheat in portions. You do not need specialty containers to begin.
Is it safe to freeze raw meat with vegetables in the same bag?
Yes, if the bag will be cooked together, like a slow cooker meal, and everything reaches a safe internal temperature. Keep raw meat separate from ready-to-eat foods while you prep, thaw the bag in the refrigerator overnight — never on the counter — on a plate to catch drips, and wash hands and surfaces after handling it.
Conclusion
Freezer cooking works when it stays simple: meals you like, packaged well, labeled clearly, eaten within a few months, and thawed safely. That is the whole system — plan, shop, prep, package, label, freeze, thaw, cook.
Start this weekend with three meals. Not ten, not thirty. Three. Learn the rhythm, eat food you are proud of on a busy night, and you will understand why people who try this rarely go back to starting dinner from scratch every single day.
Pin it and save this guide for your first prep weekend — and share it with a friend who wants to eat at home more without spending every evening in the kitchen.